Laser Cut Object: Laptop Stand
Feb 4, 2024 • 6 minute read
For this assignment, I created a laptop stand that could be assembled out of pieces cut out from a laser cutter. The stand had to hold my Macbook Air in an upright position and be cut from no more than two sheets of 18x24” flute. Furthermore, the design must be able to be disassembled into flat pieces for storage and not use any glue/tape to hold it together. To begin my design process, I drew low-fidelity sketches before experimenting with various prototypes. I used cuttle.xyz to digitally design the stand before exporting it for print and making the necessary changes.
Prototyping
After brainstorming and sketching numerous ideas, I listed out common themes between my ideas and finalized my first prototype. I then laser-cut and assembled this first iteration idea. It utilized four base pieces with a horizontal beam that connected them together. Ideally, this would have the proper width and support the laptop at the desired viewing angle.
First prototype
However, when I tested my prototype, I found that the thickness of the flute material was not enough and created a fragile design. As a result, no matter where I positioned the laptop, the weight was too much and it flattened the stand.
Iteration 1 stand unable to support laptop weight
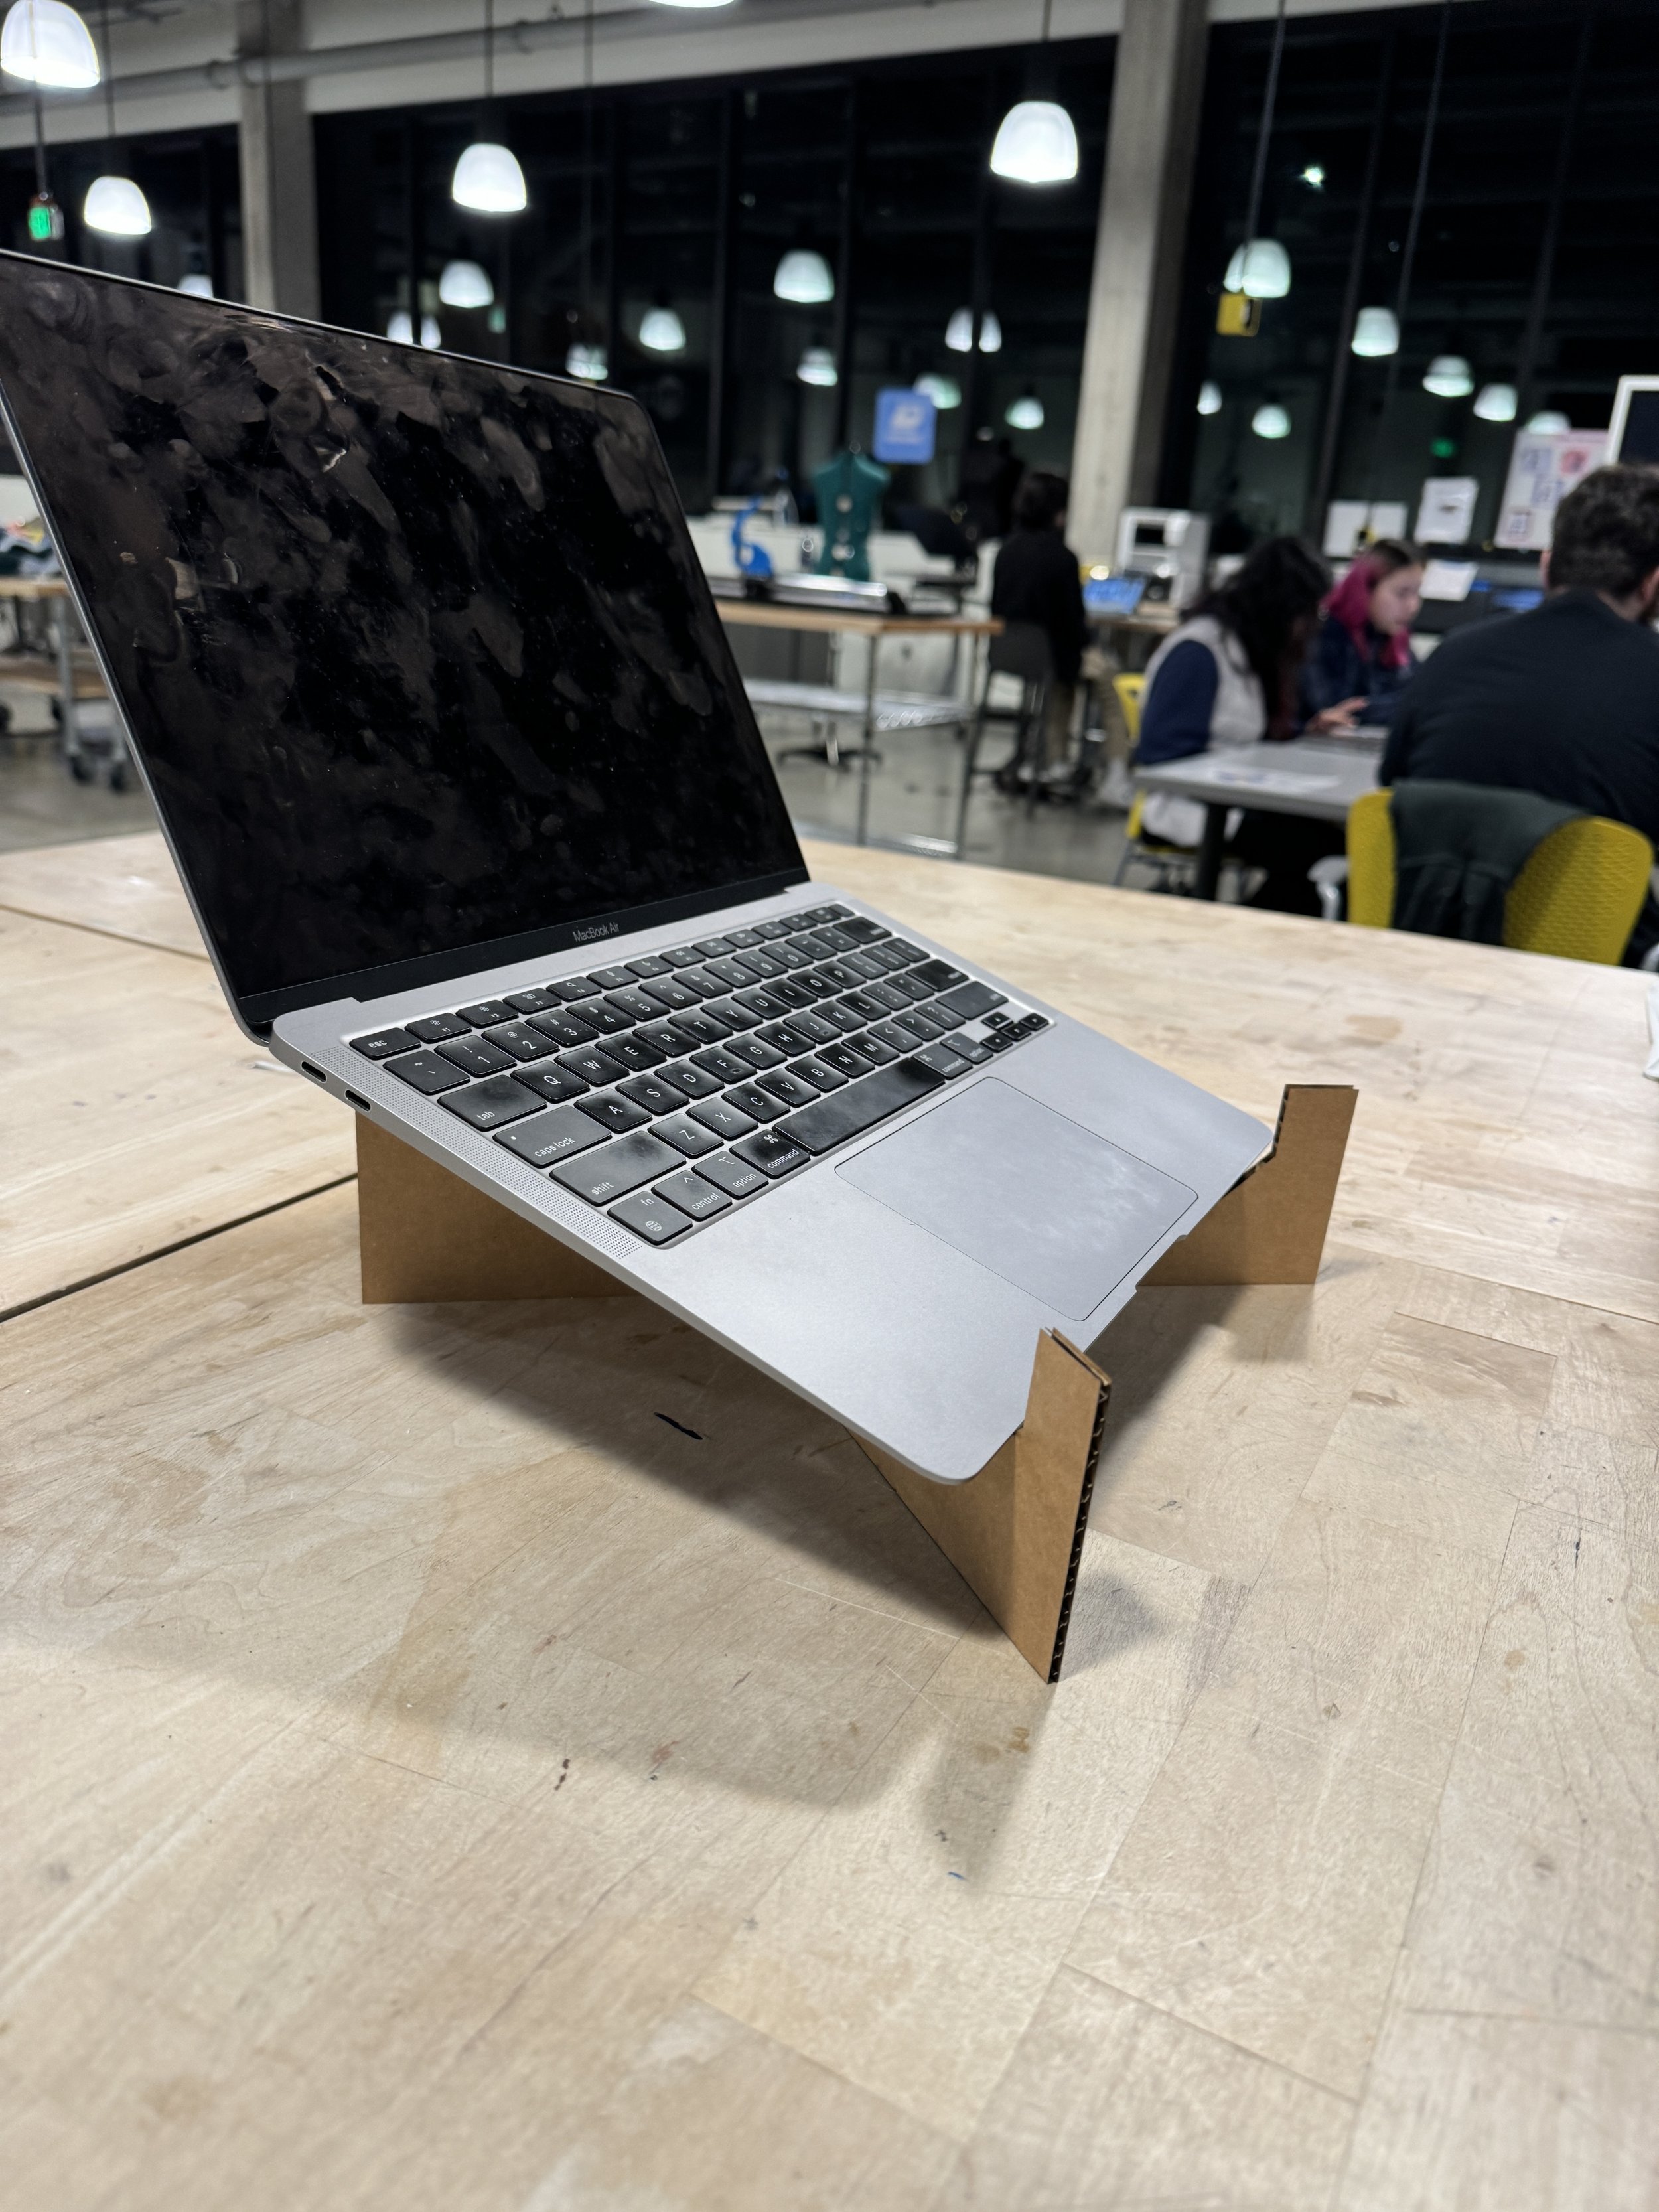
I had to rethink my design and turn back to my original sketches. I decided to pursue another idea that utilized only two base pieces that were connected with a singular slot opening. The ‘X’ pattern created by this would save material and also be more structurally stable due to its gravity-supported design.
Final Prototype
With my final prototype, I decided to lower the height of the front lip and make it a smoother piece. Additionally, I added a rastered inscription to the side to add some character to the design!
Overall, this exercise helped teach me how to design files that would be cut out on a laser cutter. Specifically using cuttle.xyz and exporting the file and proper settings from Adobe Illustrator.
Evaluation Criteria
Because the prompt for this project was fairly open-ended, it was important to write down what criteria I would evaluate my prototype on. Specifically, focusing on how I would measure these. I decided upon the following:
Desirability - This laptop stand should look visually appealing and be something that I will continue to use after this project.
Feasibility - The laptop stand should be cut out of less than two 18x24” sheets of flute and not use any glue/tape. The design should also be exported and shared easily so multiple people can recreate and use this design themselves.
Usability - The laptop stand must hold the weight of my Macbook Air (~2.75 pounds) and hold the screen at a viewing angle of 45˚.
Impact - The laptop stand should be constructed out of entirely recyclable materials to continue promoting sustainable design.
New design sketch and cutout comparison
Final prototype
Analysis
Once I finished constructing my final prototype, I presented my creation to fellow peers to see what features could be improved. I noticed that appreciated the simplicity of the design and how structurally stable it was, despite being constructed out of two pieces. Additionally, it held the laptop at multiple viewing angles and could be typed on without disturbance from the stand. Additionally, there was the unintended benefit of having the stand able to widen and close based on the angle of the pieces. This was due to the kerf from laser cutting and having the slits be the exact dimension of the cardboard thickness.
In terms of improvements, one piece of feedback was regarding the viewing angle customization. While you could adjust the angle of the screen, because the base of the laptop stand was static the keyboard was always at a fixed position. Additionally, the use of my material (flute) felt cheap and could been sturdier with wood or acrylic. If I was to recreate my design, I would also ensure to take into account of the kerf and make the slits smaller to have a snug fit between the two pieces.
Final laptop stand design
Second iteration prototype
My second prrototype was successful in holding up the laptop! It’s structure was significantly more stable and was able to complete all of my criteria. However, there were a few minor tweaks I wanted to make. The front lip was created out of pieces that were too large and caused discomfort when using the keyboard. Additionally, the design was very basic and lacked any sort of visual appeal.


